So, only a little later than promised, here’s my latest Pinterest project! This is a project I’ve had my eye on for a while, and every time I saw another version posted on Pinterest I just wanted to make it even more. And since I had some time and was looking for a new project, I thought I’d give it a try. I have to say I was a bit surprised, and would definitely place this project in the “looks simpler than it is” column. 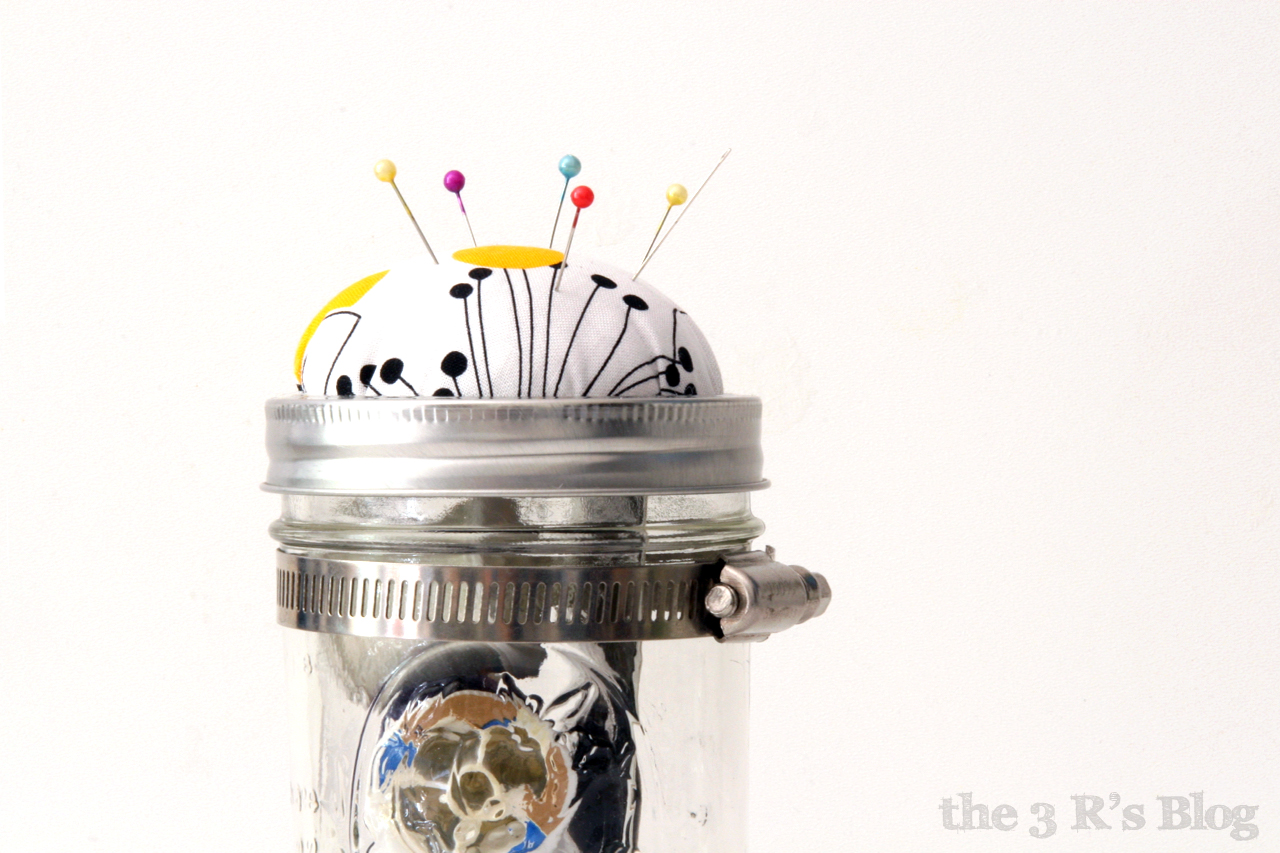
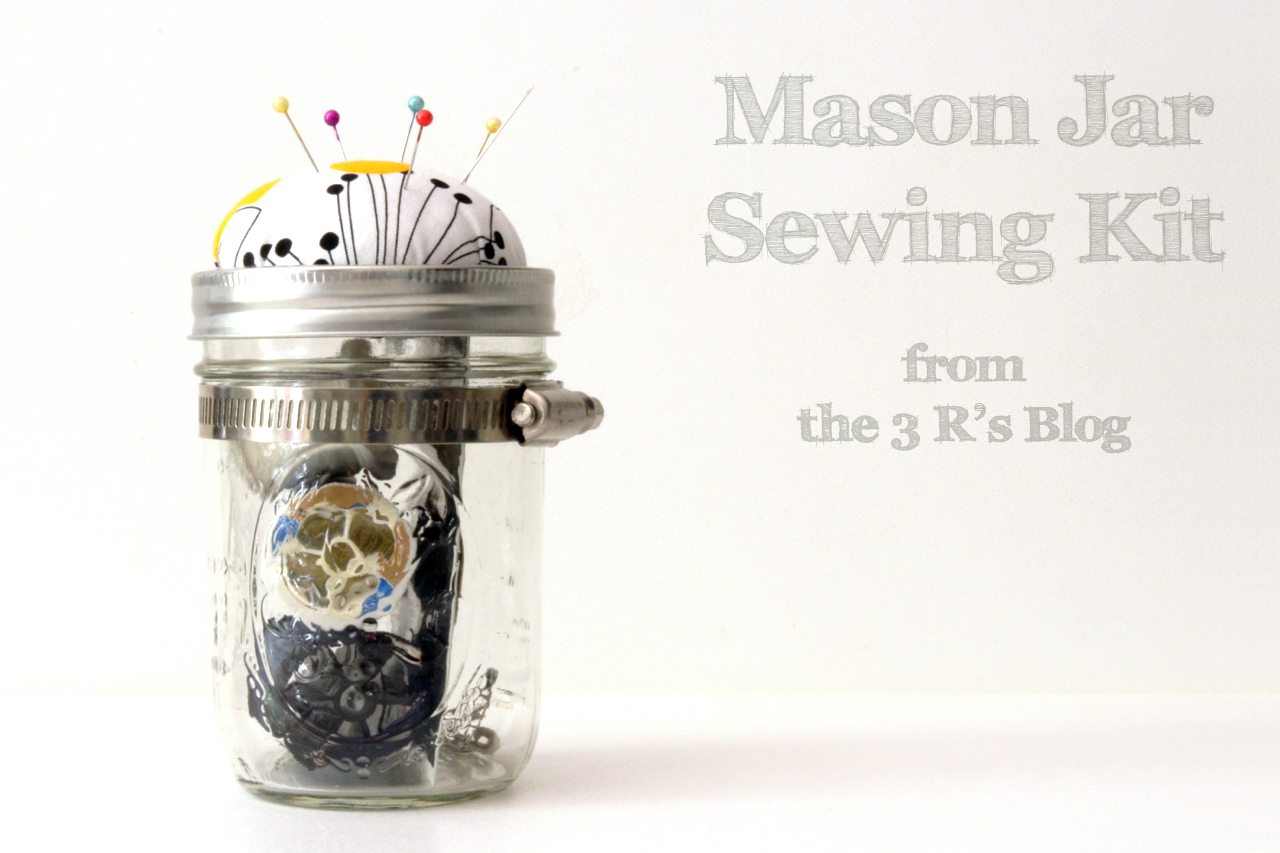
Essentially what you are doing is creating a little pincushion with the lid of a mason jar, so while you store needles and thread and other sewing items inside, you can store your pins on the top. (My best friend and business partner Elizabeth, who works in costume design when not working on our lighting business, told me that this was the most impractical sewing kit imaginable. My response was that for people like me who pull out the needle and thread twice a year, maybe, it was an exceedingly practical item! We agreed to disagree…) For materials, all you’ll need is a mason jar, a scrap of fabric, batting, scissors and hot glue. Being a non-sewing person I didn’t have any batting lying around and so made a first attempt with cotton balls. And promptly learned why all the tutorials I checked out said to use batting. My pins and needles did NOT like the cotton balls at all, and I ended up begging for a bit of batting from Elizabeth and making a second attempt.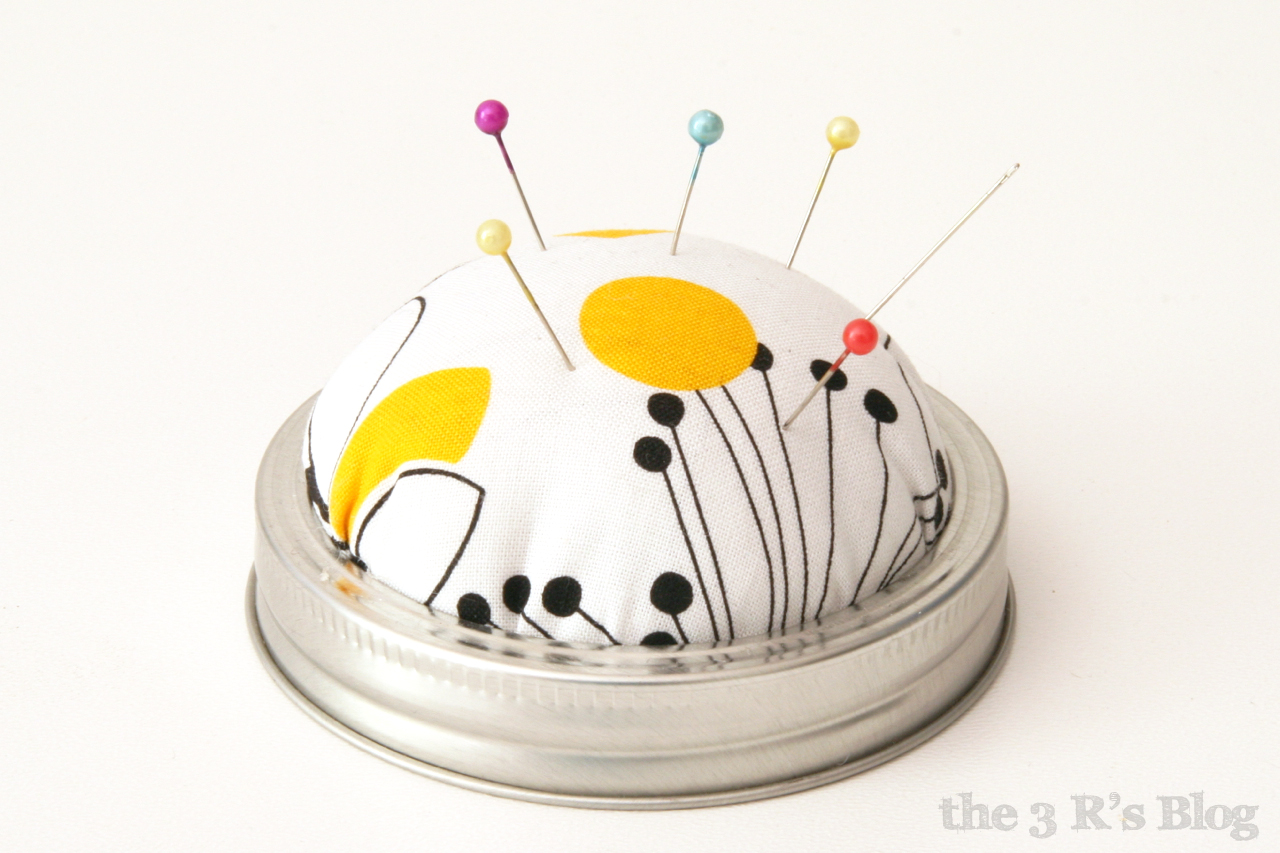
The concept is really simple. Take the inner flat piece from your mason jar lid, and use it to cut a circle out of your fabric. Leave approximately 1-2 inches of extra fabric on all sides, so the overall diameter of your fabric circle is 2-4 inches larger than the diameter of your lid. This is now where the many tutorials I read varied, but essentially you are going to glue the edges of your fabric to the underside of your lid piece, with the batting domed up inside the top part. But as I said, simpler than it sounds, so I’ll share the tricks I discovered as I worked, and hopefully you won’t have to attempt this 3 times like I did. The main problem I found is that if you have batting spreading to the edge of your lid piece, and you have the fabric both on the top and bunched up on the bottom, this creates a lot of stuff where there used to only be a thin piece of metal, and it becomes almost impossible to get your lid to screw back onto the jar. So what I decided to do was to make a little batting bundle by sewing it together with a few big stitches, to make sure my pincushion was smaller than the lid, leaving the edge that fits under the ring piece of the lid free from batting. Hopefully this makes sense. I found this was easier than trying to squish the batting in from the edges once I’d covered it in fabric. I also discovered that you shouldn’t overstuff your batting, because if it gets too compacted it will be almost impossible to get the pins to stick into your pincushion. Once I had my batting bundle I used a tiny bit of hot glue to attach it to the center of the metal lid, and then covered it with fabric. At this point I found it was also easiest if you then put the metal ring over your pincushion bump before attaching the fabric to the underside. This allows you to pull the fabric tightly, but not so tightly that you can’t get the ring part of the lid to fit securely over the top. Some versions I spotted had the most perfect dome, without any pleats or wrinkles in the fabric. I honestly have no idea how they did that. Stretchy fabric maybe? Personally I found that if you pulled the fabric that tightly so you didn’t have any puckers, you ended up compressing the batting too much, so I had to just give in and live with the puckers. Also, when gluing make sure you are attaching the fabric to the middle of the lid, and not where it will be resting on top of the glass mason jar, again so you make it as easy as possible to screw back on. Finally, I put a very thin layer of glue on the inside of the ring top and squeezed it down on top of the pincushion as securely as I could, so now when I take the lid off of my sewing kit it is all in one piece. 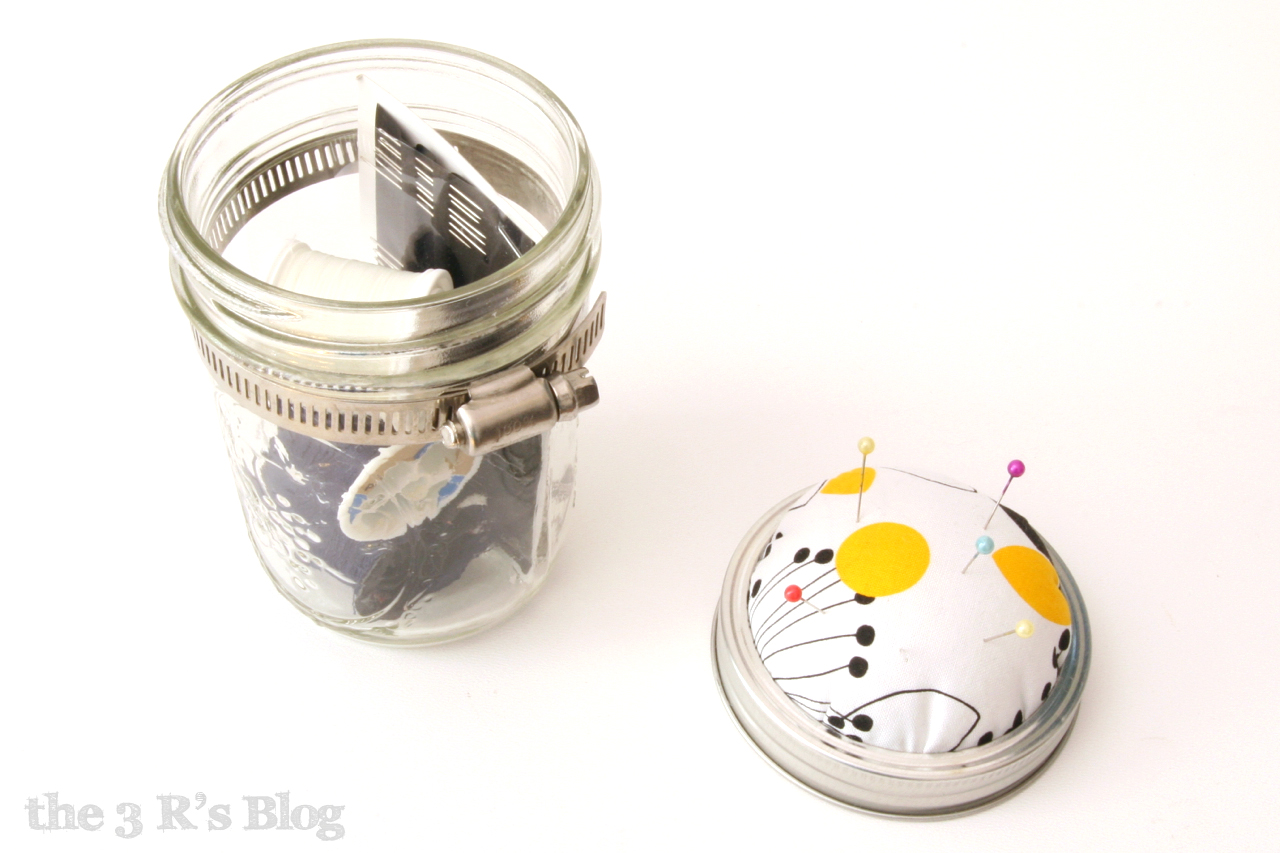
As you can see, I can fit three spools of thread and a package of needles into my kit, though I did have to trim down the cardboard around the needles to make them fit. I’ve seen some kits with small scissors and other items but I’m not really sure how they fit all of that into one mason jar. I was already using wide mouth pint mason jars, which are pretty big! But as I said, I’m not really that into sewing and just need somewhere to store my needles and thread in one place. You might also notice a plumbing ring around my jar, that’s because I have hopes that it will become part of another organization project I want to get working on, so keep your eyes peeled for a post about that in the future.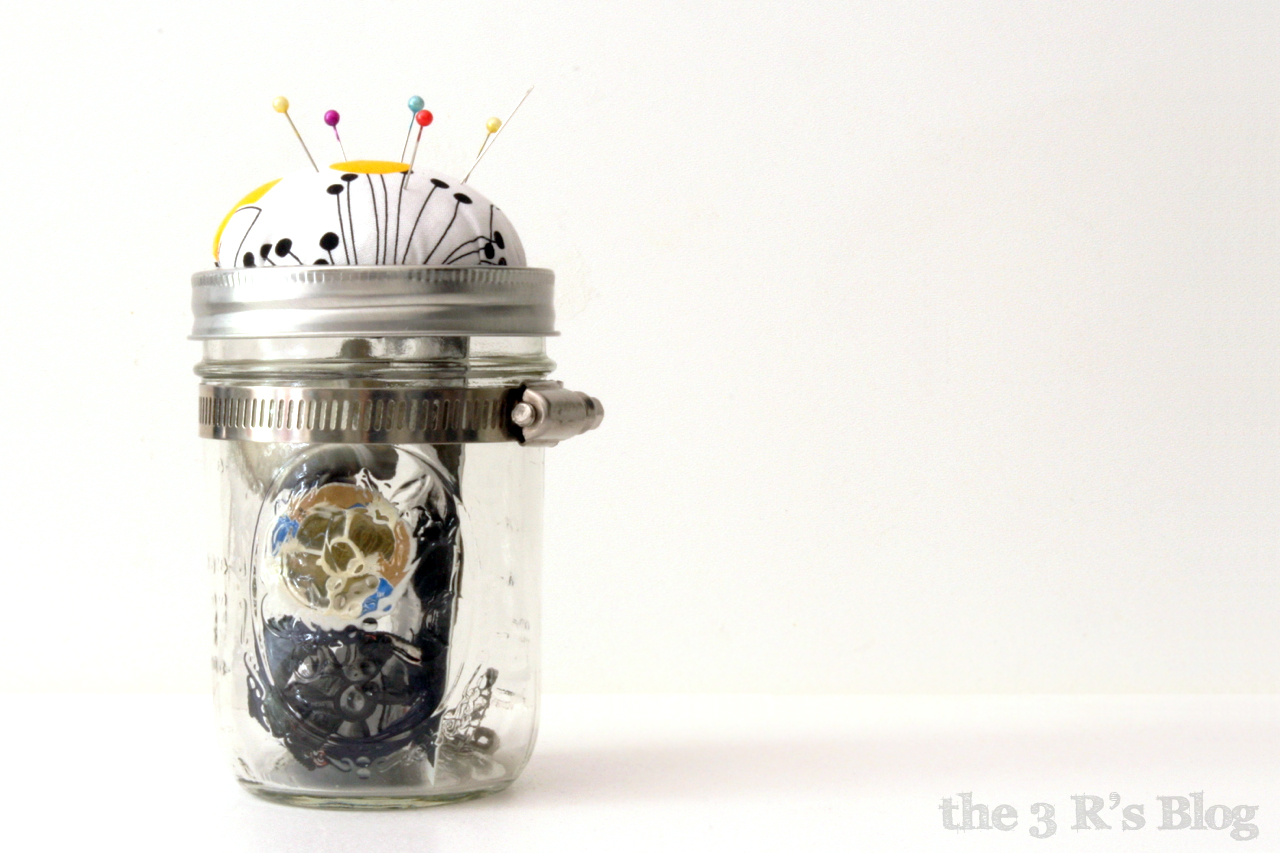
Has anyone else tried this project and found it easier than I did? I’m sure we’d all love to hear what tips you have to share!
Ciao, Allison

Pingback: Scarf Organizer | the 3 R's blog